Monday, December 31, 2012

(Humming "Auld Lang Syne")

Well, it's that time of year again. I normally don't make New Years Resolutions... I don't know why. I guess I tackle new challenges throughout the year whenever they come up.

That being said, I have decided that 2013 will be the year I learn to free motion quilt. It's time. And I'm starting by turning my piles of small batik scraps into an improv pieced, quilt-as-you-go practice quilt. Hopefully by the time I have enough pieces for a quilt I'll have graduated to decent FMQ. I feel like this challenge needs some theme music, a la "Mission Impossible." Let's do this :)

Friday, December 7, 2012

Fly South! A charm pack quilt

 I'm a total sucker for Basic Grey's lines for Moda. I don't know what it is about their designs, but I just can't resist them.  The "Little Peeks" quilt and wall hanging were made from an "Origins" charm pack and this Christmas it was the "Blitzen" line that I had my eye on.  I finally caved and bought a charm pack.

I was stumped for a few days with the usual charm pack dilemma: how to use the charms to make a decent sized throw, keeping them in large pieces but not just doing a boring grid.  Eventually I came up with this design I'm calling "Fly South".
 I turned my charm pack into flying geese, yielding 2 geese per charm, and arranged them into Dutchman's Puzzle blocks.  Unfortunately I only had enough geese to make 10 blocks, and even set on point that didn't make a very big quilt.  So, I improvised and thinned out the blocks, expanding the design.  I fiddled with it for a few days on the design wall and in the end it just worked.  I like how the geese are less dense at the edges of the "flock", as if some of them are breaking away. 
 If you'll notice, at the bottom of the quilt there are three geese which break the Dutchman's Puzzle block pattern escaping and flying South, hence the name :)  One of the geese is pieced in, the other two are 3D geese with a cathedral window-esque rolled edge.
 It's hard to tell, but these are actually sewn across the rolled bottom and tacked down at the nose, if that makes sense.  I can put my whole finger under the body of the goose.

I backed the quilt with double sided Christmas themed minky and decided to skip on the batting. Instead I added a layer of white flannel to keep the minky from showing through the white background.  Because there was no batting only minimal quilting was needed, and this throw was brightening up our family room in no time.  It just big enough to put over the back of the sofa or keep your toes warm.
I have a pattern for this about half way done and plan to finish it in the next few days.  If anyone is interested in testing it out for me, please send me an email!

I'm linking up to Sarah's Can I get a Whoop Whoop and Crazy Mom Quilts Finish it Friday.

Saturday, November 17, 2012

"Bird's Nest" Finished and for Sale!

This quilt is for sale in my Etsy shop here.

"Bird's Nest" is finished! That's what I decided to call the top I sewed up Sunday after finishing the monstrous Ocean Waves top.  Things have been quiet on the blog for the past week, but it isn't because I haven't been sewing. I just haven't had a chance to get out and take pictures as I've finished things. 
I LOVE the colors in this quilt! And I love that it is such a girly quilt without being pink and purple! Because there are some little girls (and some grown-up little girls who are now mommies) who just aren't "in to" pink and purple.  I was never a pink-and-purple girl myself.  The colors scheme for the scraps I chose came completely from the focus fabric.  It's a great mix of blues, turquoise, greens, reds, oranges, and yellows on a modern white background.
I decided to quilt this using large overlapping circles.  It didn't take to long to do and the effect is so cool. Wherever the circles overlap they make a flower shape. Perfect for a little girl quilt. When I washed and dried the quilt it krinkled, but didn't lose its softness.
The backing in another orange and teal flower print, again, totally girly and totally NOT pink.  To stretch it far enough to cover the back I mixed in some of the same orange shot-cotten that appears in the front.  The binding is a stripe that has most of the colors of quilt in it, from orange to green. I cut it on the bias and machine stitched it down to the front and back.
This is the first quilt I've ever put a label on and I'm pleased with the way it turned out.

The quilt measures 54" square, just the right size for a toddler bed or just for snuggling with.  If you are interested in owning this quilt please check out its Etsy listing and convo me if you have any questions!

Friday, November 16, 2012

"Salt Water" The Ocean Waves Quilt is DONE!!!

 The Ocean Waves quilt, now officially named "Salt Water" is finished! The picture above is the closet I could get to a photo of the whole thing.  There's about 18" more hanging over the back of the swing. Prepare yourself for a picture heavy post.  I am pretty darn proud of this baby :) 
My LQS had this great sailing theme fabric on sale a while back. I didn't get enough to do the whole back, but it covered about half.
864 2" HSTs to make one twin-size quilt; somehow the triangles look smaller now that it is quilted and washed.  Prior to shrinking in the wash this quilt measured 64"x72", a modest twin.  Despite that, it is probably the most ambitious quilt I have ever taken on. The only one that would be close would be the Carpenter's Star quilt I made last Christmas with its abundance of Y-seams.
It says "The cure for anything is salt water- sweat, tears, or the sea." Isak Dinesen.
I work at an embroidery shop, so I was able to sew up a panel for the back with this classic quote.  I set it with some variegated blue fabric and two novelty sailing fabrics.  The recipient of this quilt is a tall ship sailor, so the nautical theme is perfect for him.  I did sew up four copies of this panel since that's how many the machine can run at once. I still have 3 more in various shades of blue to play with, so who knows what projects those may turn up in later ;)
The blues for this came exclusively from scraps I have picked up over the years, mostly from remnants bins. I was actually surprised how small of a dent it made in my overflowing collection of blue fabrics.  There's a denim like fabric in here, two different shot cottons (my favorites!), a blue plaid, and a few different small prints.  The combination of them all together looks better than I ever hoped.

I quilted this with wavy horizontal lines.  I suppose they look like waves.  Mostly I just wanted something curvy that would break up the straight lines of the HSTs.  I quilted it pretty densely; some of the lines cross over each other and others don't.  Fortunately, it was pretty quick quilting after such a long piecing time.  It krinkled up amazingly after a wash and dry. Maybe because of all the different small pieces? I don't know, but I like it!
Another gratuitous shot of the quilting in the light.
I love this quilt.  Plain and simple.  It would be hard to give it away if it were going to just anyone, but I'm pretty fond of this boy, too :)  This quilt is proof to me, if there ever was one, that when quilting it's not worth it to get caught up in the details.  The points of all those HSTs are "approximate" in a lot of places.  A lot of them are right on, while others are off as much as a quarter of an inch.  Because I skipped over trimming to HSTs my blocks ended up slightly large and when trimmed down to 8.5" square it was impossible to make the points meet perfectly where they came together.  If you look too closely at these pictures you'll see what I'm talking about.

But I don't care :)  This quilt looks great from 10 feet, and nobody who's going to be looking at it close up will care about the misaligned points.   It's worth every bit of the time and effort that went in to it and I love that it looks homemade and invites cuddles.  I couldn't be more happy.  Well, scratch that, when I give this to its new owner, that will be the happiest moment.
A parting shot.

Thursday, November 15, 2012

Scrappy Quilt in the Spotlight

 This isn't a new quilt, in fact it's one of the very first quilts I ever made.  It's old enough to have some stains and signs of wear.  But, it deserved better pictures than the ones I had of it so today was the day.  During the summer months this hangs over the rail on the stairs, but this time of year it goes on my bed.
 You can read more about the details of making this quilt at its original post here but basically I had some oddly shaped scraps left from an Authentic jelly roll after making another, smaller quilt.  Almost all of the scraps I had were various sized triangles made up themselves of strips sewn together.  I didn't want to throw them away, so what else to do but try to reassemble them?
 Nothing is regular on this quilt. None of the blocks are the same size, I built them up with the muslin sashing to even them out.  I had 6 whole strips left from the jelly roll, so those became the borders on the offset squares. This was the quilt where I discovered the magical joy that is setting blocks on point to make a larger quilt.
 I quilted it with diagonal not-quite-straight lines at unevenly spaced intervals, also the first quilt I tried that technique on. It's now a favorite of mine.  The borders were bought on sale and JoAnn's and before I knew it I had a generous twin size quilt from scraps.
Like I said before, this is the quilt that goes on my bed during winter.  It's warm and snuggly and I love the colors and the scrappiness of the top.  It's perfect :)

Sunday, November 11, 2012

Merry and Bright

Yes I know it's early, but I was in the mood to get in the attic and drag everything out, so I figured I'd better take advantage of it.  The past several years we haven't had a shred of Christmas decoration because we've all been so tired by the time the holidays come, the last thing we want to do it go to the trouble of decorating.  This year though I've made up my mind: We are going to participate in Christmas, lights and tree and all.  I got out one of our antique quits to use as a tree skirt and Wilson has already made himself at home under the tree.  So, here's hoping all is well where you are and all is Merry and Bright :)

Thursday, November 8, 2012

Sunday Afternoon quilt

 After finishing the Ocean Waves flimsy I had the itch bad to piece something quick and simple.  So, Sunday I whipped up this sweet little baby quilt.  I've had most of these fabrics forever. One of the rare times I bought several cuts from the same fabric line that all went together.  Having stared at them long enough, I decided it was finally time to do something about it.
The focal fabric is this great bird print with teals, oranges, and greens.  I cut the focal fabric into large squares and cut rectangles from the coordinates plus some additional fabrics from my stash.  It's undeniably girly, but NOT pink and purple.  I love that.  I'm planning to put this one in my Etsy shop when it's done.

It measures 54" square and I can't tell you how good it felt to finish a top in a day!

Sunday, November 4, 2012

I did it!!


From a bin full of HSTs to a completed top, 2016 pieces later, Ocean Waves is finally a flimsy! By the time I realized how insane this project was I was already too far in to quit. My plan to finish was to get done before I could realize how overwhelming the amount of piecing was.
864 HSTs ready to become a top
It was definitely a long haul, but today I was able to sew, press, and trim the final blocks and get the whole things assembled. By the end I was able to sew (16) 2.5" units into a 8.5" block in less than 10 minutes, a major improvement over my pace at the beginning. Surprisingly (although perhaps not...) I think the single most time consume element of this whole process was pressing all those seams open.
A shot of part of the back

The next step is putting together the back and layering for quilting. Fortunately, I am planning a simple, quick quilting pattern for this monster!

Wednesday, October 31, 2012

Homemade, cheap, warm winter boxes for outside cats

Well, it's that time of year again. When we worry about our outside animals and whether they're warm enough. We have quite a few porch cats and in years past we've set up a sort of kitty condo of stacked crates and blankets, but this year I decided to try something different for them. I heard about this cheap, simple solution from a family member and I have to say, it was as easy and cheap as promised and the cats love it. So, without further ado, here is my tutorial for making a cat igloo.
Step 1: Cut a hole in the box

First you need to get one of those small, cheap Styrofoam ice chests. I don't know what size this one is, but it says it holds 24 cans and it cost about 2 bucks. Using a sharp knife cut a hole in one of the short ends of the ice chest. Cut the smallest hole you think your cat can fit through. I would recommend starting out with a hole you think is too small because you can always enlarge it later. The smaller the hole, the less cold air will be leaking in.
Step 2: Add a door flap
Next, you can add a door flap if you want a little extra cold-security. I used a slice from the leg of some coveralls with a layer of batting in the middle.  Make it just wider than your hole and long enough to hang a few inches past it, then glue it (I used hot glue) to the bottom of the ice chest below the hole (this will be the top of the finished cat igloo, so the flap will hang down).  
Step 3: Glue on the lid and flip the box over.
Next, using hot glue or another glue (not superglue, it melts Styrofoam), attach the ice chest's lid.  Flip the whole box over and, ta-da! It's a cat igloo!  I stuffed an old cushions through the door hole to pad the bottom of the box.
Step 4: Set in a sheltered place
Now all you have to do is set out your cat igloos in a sheltered place and introduce them to the local cats. Ours weren't too sure about the whole thing until it got pretty cold; now they're in there every night!  I've checked the temperature in the box when one of our cats was inside and it was nice and warm, even when it was near freezing outside.

I've seen similar ideas for colder climates that involved encasing a Styrofoam cooler inside a large plastic tub with a lid and packing straw (for insulation) between the two boxes.  Cut a hole through both boxes to make a doorway and you're all set.

Hope this helps somebody!

PS: I am up to 58 blocks out of 72 done on the Ocean Waves quilt!!

Monday, October 29, 2012

My points match! (mostly)

Bit of a blurry picture but it shows the true colors
One of our local community theaters is doing "Quilters: The Musical" coming up this next summer. During the play the characters put together a quilt with 16 blocks, so of course we need to make a quilt for the show! We're actually making 2 quilts because we need one complete for the end of the show and one incomplete as a prop.

I got the task of making the two lonestar blocks we need, mainly because no one else wanted to volunteer for them. The quilter who is in charge of the whole project has, to say the least, a different quilting style than me. She's one of those quilters whose points all match and who never have a clashing color in their quilts. I was worried if I would be able to make my blocks up to her standards, but I have to say I'm pleasantly surprised. Still not sure if it will be good enough for her, but I'm impressed.
The view from the back.  I pressed all the seams open to reduce bulk.
In other, and much sadder, news.  The tall ship HMS Bounty was lost off the east coast this morning in Sandy.  14 crew were rescued, one has been found dead, and another is still missing.  The tall ship community is small and tight knit and I thoughts and prayers are with those sailors and their families today.

Saturday, October 27, 2012

Blogger's Quilt Festival: Harley Memory Quilt

Quilt Festival!
 It's that time of year again! I've admired the quilts in the Blogger's Quilt Festival before, but this is my first time to enter.  My entry this year is the Harley t-shirt memory quilt I made for my cousin out of some of her father's Harley stuff.
The finished memory quilt
 This quilt measures about 60x70 and everything in it except for the black solid sashing, the gray solid that the patches are mounted on, and the checked fabric in the back was made from clothes.
The original pile of "source material"
In the assortment of clothes my cousin sent there were quite a few T-shirts along with half a dozen patches from motorcycle rallies, a do rag, and a pair of boxers.  One of my big challenges was that I wanted to use everything I could, so that meant I couldn't use a traditional t-shirt quilt layout as the patches would be all different sizes. 
I designed the final layout using 12"x14" big blocks with a 5"x14" strip beside them which could be subdivided as I needed.  The sashing around the big blocks is 2" wide and the sashing within the blocks is 1" wide.  I sketched the layout and played with the random arrangement of the big blocks until I was happy with them.
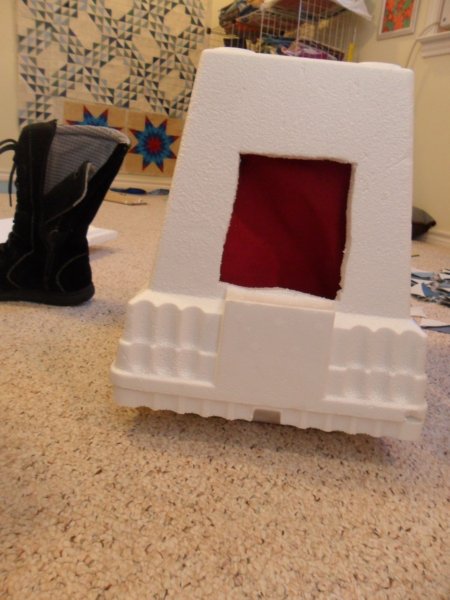
Motorcycle boxers cut along the seams and stabilized with iron-on backing.

 The camo background on the front of the quilt all came from one camo shirt. I used patches that included the pockets, buttons, and tags to preserve the character of the clothing.
These buttons can be unbuttoned to reveal the small motorcycle print from the boxers underneath.
I quilted it simply because I didn't want it to lose its softness, and it was already quite heavy.  I stitched in the ditch around all the blocks and made double sure the patches were securely attached by sewing them down again, through all 3 layers.  Anywhere that needed additional quilting I chose a matching thread color and tried to outline elements of the t-shirt design or stitch along existing seams from the clothing.
The camo at the top is the shoulder panel from the back of the shirt, complete with pleats.
In the back of the quilt I used up all the bits I had leftover from the front with a simple arrangement and set it in a checked flannel sheet.  The flannel made the quilt extra cuddly.  I know that this is going to be a treasured keepsake, so I really wanted it to be comfortable and functional. 

The back of the quilt, using up leftovers.
At the last minute I remembered to cut the tags out of the t-shirts and attached a couple under the binding of the quilt.  I machine sewed the binding to the front and then turned it and hand sewed it to the back.
A tag from one of the  T-shirts
My quilting companion and Chief Quilt Inspector, Wilson, tested for quality control before the quilt made the long journey by mail to Mississippi.

Wilson: Quilt Inspector
Working on this quilt was a healing process for me.  I began work on it about a year and a half after my uncle had passed away and the wounds were still very much raw from his death.  Something about the physical labor and time put into the project helped me to feel like I was moving on. It was easier, I noticed as I was making it, to focus on the details than the big picture. It was easier if I let myself forget that these were clothes, and let them just be fabrics.  That is another reason that I try so hard to preserve the character of the original clothing when I make a quilt, because I want it to be clearly tied to the person who wore those clothes.  Unlike a quilt made from new, crisp fabrics, these fabrics show wear and tear.  Signs of love and life.

Focusing on the details
It was gratifying to feel like I was actually able to DO something to bring comfort to my cousin and her mother because for so long there was nothing anyone could do.  Really, a quilt is a small thing, and no matter how much comfort it bring that is only a drop in the bucket to the loss of a loved one.  He is gone, and nothing can bring him back.

My Uncle Steve
Steve killed himself on Aug. 17th 2010 and we miss him every day.  He showed no signs of depression, he was not in debt, had a good job and was very much loved.  He could be your friend or family member. 

Suicide is a real thing. It happens. We need to talk about it to spread awareness and reduce the stigma of seeking help.  There is help out there; no one is alone.  If you need help, call:  Suicide Hotline Directory.

Blogger’s Quilt Festival Stats
Finished quilt measures : 60″x 70″
Special techniques used : applique,peek-through fabrics behind buttons
Quilted by : myself
Best Category : Scrap Quilt, Throw Quilt, Home Machine Quilted
entry # 310

Read more posts about this quilt here.

Friday, October 26, 2012

I sold a quilt!

I sold a quilt! This quilt, in fact.  One half of the New Wave set.  To say I was excited would be an understatement.  I feel like a "real" quilter now.

Not too long ago I revamped my Etsy shop and listed a few of my homeless quilts for sale.  Like most quilters, I give almost all of my quilts away.  Most of them are destined for a particular home before I even start on them.  The time and effort I pour into making a quilt that I hope the owner will enjoy are a dedication to that person.  Most people have never had a quilt that was made just for them and I earnestly hope that every quilt I give will be loved and enjoyed in its new home.

I had held off on trying to sell any of my "extra" quilts because I was afraid it would feel impersonal, to sell something that really ought to be a gift.  But... The piles of quilts around the house were getting out of hand and I could use some extra funds.  Besides, I hate having homeless quilts sitting around.  Quilts need to have a home and a purpose, they aren't made to it on a shelf.  So, I listed three quilt for sale and after a few weeks this one sold.

I was surprised, although maybe I shouldn't be, that I feel just as excited for this quilt to go to its new owner, a stranger, as I do when I give a quilt to a friend! I can't wait for it to arrive at its new home and for them to enjoy it.  Rather than feeling like I sold a quilt, I feel like it was adopted.  My homeless quilt has a home, where it will be loved for years to come.  Can anyone else identify with this feeling? 

Wednesday, October 24, 2012

37 out of 72 done...

Little by little the Ocean Waves quilt is coming together.  I am a little over half way there!