Thursday, October 30, 2014

HST Waves, and There's a Cat on my Quilt!

The HST waves quilt got done this morning. I'm so grateful for the Friday linkups that give me to push to get something done every week.  This one will be a gift for a coworker having a baby soon.


After I got it all washed and dried I took it out in the yard for a photo shoot. Wilson was feeling exceptionally frisky. Apparently "Cat Day" happened this week; someone must have told him!  I couldn't keep him off the quilt so I just shot around him. Of course he knows who the real star of the show is :)


This quilt was meant to be similar to my Gatsby! quilt; I've been wanting to do something with pieced and solid waves blending together for a while now.


The quilting was fun to do. First stitch in the ditch along the curved seam, then just a simple stipple over the pieced parts and this sort of elongated stipple that reminds me of ripples in a pond over the blue parts. I didn't find a tutorial for that one, but I've seen it several places including at Crazy Mom Quilts.


I used the ever-popular IKEA numbers fabric for backing again.  As you can see a bit above, and better in the pic below, I was switching my bobbin thread along with the top thread so the ripples show on the back in blue.


The quilt finished about 42" x 60", a generous size for a baby/toddler quilt.  Here's hoping it will be enjoyed by these 2 little boys for years to come! 


And now that we have all paid homage to the king perhaps he will get off my WIP stack so I can get back to work!


Linking up to Finish it Friday at Crazy Mom Quilts.

Sunday, October 26, 2014

October do. Good Stitches Blocks

On my design wall this Monday are these two star blocks which will soon be mailed off to Washington. These were my October blocks for our do. Good stitches circle. (Tutorial is here if you want to make some yourself.)  These blocks finish at just 12.5" sq and each one contains (64) 1.5" finished units, many of which are HSTs!  So that was today's afternoon sewing. They look great, and I can't wait to see the finished quilt, but I am so glad I don't have to make any more of these!


Friday I cut fabrics for the Fair Isle sew along over at Freshly Pieced, which was time consuming but not very photogenic. Then yesterday I started cutting and laying out fabrics for a new strip quilt (you can see the focal fabric above the stars in the pic above) but I didn't get anything sewn together yet. And tomorrow I have to go back to work :( Looking forward to Wednesday when I can sew again!

Linking up to Judy at Patchwork Times.

Friday, October 24, 2014

Distortions do. Good Stitches Quilt {Bloggers Quilt Show}

It's time once again for the Blogger's Quilt Festival, where all of us who wish we were in Houston console ourselves with our own quilt show. Which is totally better that Houston anyway, right? Maybe ;)


Every year it seems I am liking up my latest do. Good Stitches quilt for the show, but they really are usually my favorites and the ones I am most proud of.  This year is no exception. I designed this block based on the Fibonacci Sequence and the final quilt is called "Distortions" after the illusion of curves it creates.  You can read my tutorial for the block with explanations of the sequence and its significance here.


I asked my group members for blocks made in solid, boy-friendly colors and they delivered handily.  I didn't want to detract from the illusion is a lot of quilting so instead I used an invisible thread to try to amplify the curves.


For the backing I used the thematically-appropriate IKEA Numbers fabrics and a couple of stray blocks.


The quilt has since been sent to "My Very Own Blanket" a charity that provides quilts for children in foster care. Thanks, as ever, to my wonderful do. Good Stitches Circle!

I am linking up this quilt in the "Modern" category. You can see my other entry in the "Large Quilt Category" here.

Stats:
Block designed by me, tutorial here
Pieced by the members of the NURTURE circle of do. Good Stitches
Quilted by me on my home machine
Dimensions 50"x60"

Honeycomb of Hexagons

I got the Honeycomb quilt finished this week after all! Perfect timing as the linky for the Blogger's Quilt Festival opens this week and I can't think of a better quilt to enter. Remember, this is the quilt I based on the "Honey" design from Elizabeth Hartman.


This is really a 60degree triangle quilt which could be assembled in the normal row method. I've done that before, remember the Squirrely triangles quilt? However, this time I chose to assemble the triangles into hexagons first and then sew those together using this technique from Jacquie Gering. Don't ask me why. It seemed like a good idea at the time and, really, it wasn't too difficult.

I made this quit for my grandparents. I always find it extra intimidating to quilt for people who have very coordinated living rooms, do you? Like, if I make a quilt that isn't in their colors it won't "go" with the rest of the room so they'll feel like they can't use it.  I mean, let's face it, highly coordinated limited color schemes isn't my usual style. So, I paid attention last year at Christmas to the colors in their living room and these were what I saw. Let's hope they haven't redecorated this year!


The hexagons are made from a variety of fabrics, prints and solids, and sashed with my all-time favorite manly neutral tan. Obviously there is a honeybee theme going on with this quilt.  This will be a Christmas present for my grandpa who keeps bees. That has been his hobby since retirement and he now has a lively side business selling honey.  The paper pieced bee pattern came from Badskirt.


When it came to quilt I hit up Google and found this cool honeybee FMQ at the Inbox Jaunt. I mixed it in with a stipple for the quilting. After a few practice bees on the lighter colored fabrics where it didn't show as clearly it became a natural pattern to sew and I was ready for the dark reds and blues.


The backing is a mix of a Moda solid and yardage from Basic Grey's Sweet Serenade line.


I decided to leave the edges uneven rather than cutting any hexagons in half or adding some background-color setting hexies along the edges.  Instead I just bound around all the corners. It was time consuming but not very difficult.


The quilt ended up at 66" x 72" or so, decent for a couch quilt.  I'll be hanging onto this one until Christmas I suppose. Hard to wait for the surprise!


Linking up to Finish it Friday at Crazy Mom Quilts and Blogger's Quilt Festival at Amy's Creative Side. This quilt is in the Large Quilts Category (just barely!)  View my other entry in the "Modern" category here.

Stats:
Patterns used by Elizabeth Hartman & Badskirt
Pieced by me using various fabrics
Quilted by me on my home machine, bee FMQ design by The Inbox Jaunt
Dimensions ~66"x72" (the irregular edges make it a tad difficult to measure)


Tuesday, October 21, 2014

Photos from the Quilting Trenches

Quilting is in full swing here today!


The Honeycomb quilt is on the machine, Wilson is helping of course.  Check out the cute little bee FMQ from The Inbox Jaunt.


Back to work!

Linking to WIP Wednesday at Freshly Pieced.

Monday, October 20, 2014

Honeycomb Quilt is a top!

The Honeycomb quilt is on the design wall and the top is finished. The paper pieced bee in the corner came from this pattern at Badskirt and the over all design is from Elizabeth Hartman at Oh Fransson.


With any luck I can get the back pieced and the whole thing basted today!

Linking to Judy's Design Wall Monday and Hexie Weekend.

Thursday, October 16, 2014

The Panda Quilt

So this is the Panda Quilt. Seems I've gotten decidedly less creative lately with naming my quilts :)


The quilt top is made all from batiks. The panda was paper pieced from TartanKiwi's pattern which I doubled to make a 24" block. The background was made from a jelly roll using Fat Quarter Shop's Jelly Roll Jam II pattern. I was hoping that the background would give the effect of a bamboo forest surrounding the panda.


I did FMQ on the quilt using a variegated blue/green/yellow thread. I made up a design that resembles bamboo, mostly straight lines with little swoops at intervals for the joints. To help it look more random I added a few diagonal pieces in after the rest was done.


I debated whether to do something different over the panda, but in the end I did the same across him, too. I think it looks alright. Kind of like he is peeking from behind the bamboo.


Ironically I used a bamboo batting in this quilt. I scored a whole bolt of it at Tuesday Morning a while back and have been using it in my baby quilts.  It is very light and noticeably thinner than Warm and White or Hobbs, which I would normally use, but can still be quilted up to 10" apart, like those. Generally I prefer a slightly heavier quilt, but for babies this is really nice, and it washes and drapes beautifully.


The backing is mostly a pretty teal lawn fabric I've had in my stash (on top in the pic above) which is oh so soft. The finished quilt measures ~ 38"x48" and is listed in my Etsy Shop.


Linking up to Crazy Mom Quilts Finish it Friday!

Wednesday, October 15, 2014

Honeycomb WIP

Do any of you remember this quilt? Probably not, I started it back in about February and then laid it aside.  Well, I need it for Christmas this year so the time has finally come to finish it.  All my hexagons are pieced and I've started joining the columns!


A late entry to WIP Wednesday @ Freshly Pieced.

Friday, October 10, 2014

Ben's Quilt Finished :)

This quilt never a real name beyond just "Ben's Quilt" and so it will stay.  Ben is my good friend who fixed my sewing desk back several months ago so the machine is recessed flush with the desk. And he's just an all around good guy who deserved a quilt :)


Ben said he likes "all the colors" and patterns like stripes, plaids, and paisley. When I asked him to choose a fabric he really liked from my stash he chose a hideous rainbow stripe that I must have found in a remnants bin.  Sigh.  So I made an executive decision on a loose color scheme that seemed to work and started cutting!


Ben is 6'2" or so, so the quilt finished at 72"x81".  I knew I needed to use something really soft on the back, so I found two fabrics on sale at Hancocks. The Longhorns fabric is fleece. They had several Longhorns patterns and I picked the most attractive one, but it was a stretch. The brown fabric is a kind of fleece too I think, but more minky like. Someone described this as like someone skinned a chinchilla :)  Very very soft, deep pile.


For those of you who don't live in Texas, A&M and UT are the two big state schools and they have a fierce rivalry. I went to A&M, Ben went to UT. I did the majority of the backing in his school colors but I had to add in a little A&M patch, since it's coming from me and all!


I was worried about how the quilting would go with the stretchy, fluffy fabrics on the back but it was fine. I had no puckers, folds, nothing! Plus the quilting shows up so nice on the back. I did FMQ square spirals in all the blocks, which made it easier to tackle such a large quilt. One block at a time!


Wilson really enjoyed the fluffy brown fabric. I've since made him a cat bed covered with it in the vain hope that he will sleep on it instead of in my lap when I am trying to sew!


Labeled, folded and ready to go.  It was received with much excitement and it already being used in its new home!


Linking up to Crazy Mom Quilts Finish it Friday!

Monday, October 6, 2014

Around the World Bloghop - My turn!

Hey everyone, I am sure you have seen the Around The World Bloghop going on around blogland. I was tagged last week by the wonderful Liz of LizzyClips Design. So now I get to answer these 4 simple questions!


What am I working on?


I am sort of in a lull today. Over the weekend I finished Ben's quilt, which was the big one I had been working on. And I quilted the 
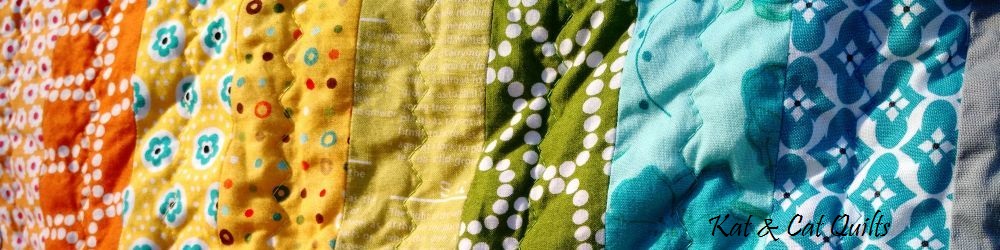
panda quilt, too ("finish" posts are not up yet for either one.) The HST waves quilt (above) is a finished top that needs to be basted and quilted before the baby it's meant for arrives.


And of course I am always working on a scrap project. Currently I am working on a quilt that uses crumb size pieces, 2.5"x1.5", that will be set on point to make long zig zags. So far I have (677) 2.5" units of the 800 someodd I will need. It reminds me of the gum wrapper chains people used to make :)

How does my work differ from others of its genre?


Obviously I'm a modern quilter, but I like to think that I am informed by traditional designs and techniques.  Sometimes that means I modify a traditional design into a modern quilt, like in the Drunken Circles quilt or the off center Lonestar.  Other times I actually make designs that are pretty traditional, with just a little modern twist, like the Crumb Jar Nines.


I also have a strong preference for using scraps, which I think is somewhat uncommon in the "modern" quilt world.  I find scraps more inspiring than whole cuts of fabric; I'd rather make a quilt from scraps any day.  I save everything down to about 1" square, and I have found ways to use them, too! My Sherwood Forest quilt used any crumbs that were at least 1.5" on one side.


Why do I quilt and blog?
Over the years I have found a lot of different ways to spend my time and satisfy my creative drive. I write, do community theater, play computer games (yes, that can be creative!) But I have to say quilting is the best thing I have come across.  It appeals to me because I can see a project though from idea to completion, which I could also get somewhere else, but quilting is unique because at the end of the day I have a tangible object to show for my work.


Quilts are perfect for gifting to other people because every one can use a blanket. It's not just pretty to look at, it 's useful. Not like something you're going to put up on a shelf and have to dust around constantly.  Usually people are really really excited about getting a homemade quilt; most people have never had one.  I gave a friend his a couple days ago and this 32 year old man did the cutest little happy dance you've ever seen.

(Not the 32-year-old I was talking about, more like 82, but he was pretty excited too!)
I blog simply because I want to remember the quilts I have made. Every quilt has a story and I want to keep those stories written down.  I average upwards of 20 quilts a year, so if I didn't have a record of them I would never remember! You can see my old quilts in the "Finished Quilts" tab above.

How does my creative process work?

Often my design process starts with a picture I've seen. I have a large file of "inspiration" photos on my computer. Then I usually move to graph paper, do some quick math, and get into the actual cutting an assembling. I don't like to spend too much time planning things out before I start and frequently make changes as I go.

Scrap storage
I also sometimes start my design process with a particular fabric(s) I want to use. Whenever one of my sections of scraps is overflowing it's time to make a quilt using triangles or strings or blue tones, whatever it may be. That is my favorite place to start from.  I like trying to solve the problem of turning scrap fabrics into something useful and beautiful.

So there you go, Kat the Quilting in a nutshell!  For the bloghop to continue I'm supposed to tag a few people to post next.

I am tagging the very creative Mihaela at "A Beautiful Day".  She makes the most wonderful quilt patterns based on traditional Romanian needle point. I used one of her patterns to make my Country Home quilt.

I am also tagging Barb from Cat Patches, who blogs about quilting, cats, travel, gardening, and canning - all of my favorite topics!

Thursday, October 2, 2014

Baby Batik Pinwheels

I made another scrap quilt from Judy's batiks. This time a cute little baby quilt in watermelon colors-- pinks, purples, and green.


Everything in this quilt is made from 2.5" strips, and I had enough of them to make the quilt 40" square.  I know this isn't an original design, I've seen it before, but it is very flexible and versatile. I am going to put a little mini tutorial down at the bottom about how I did it.


I quilting it with a loose stipple using a variegated pink/purple/teal thread.  Backed with two cute flannels that came from the remnant bin and bound in more green batik strips.


To make this design you start by making rail fence blocks that end up square.  How big you want to make them is based on the fabrics you have to start with and how big you want your final quilt. The bigger the blocks are the further apart the pinwheel will be in the finished top. I went for 8.5" blocks, which equaled (4) 2.5" strips across.  (You could do a 6.5" block with 3 strips, a 10.5" blocks with 5 strips, etc.)


Next you add the pin wheels. The triangles come from rectangles cut on the diagonal. My rectangles were 2"x4" to start with.  The longer and skinner your rectangles are the more pointy your pinwheels will be, the more squarish you rectangle, the closer to diamonds/squares on point the pinwheels will be.


Attach the triangle to opposite corners. Each block uses a matched set of triangles, ie if you put them back together they would make a rectangle. Sew the block together and voila! A cute finished baby quilt.


Not exactly a complete tut but hopefully it gives you enough to start!

Linking to Crazy Mom Quilts Finish it Friday.